How to install Heroes 3.5: Wake of Gods (WoG) guide 2026

I have prepared a simple guide for everyone who wants to relive the year 2001, when they first discovered the Heroes 3: In the Wake of Gods modification and spent dozens, or even hundreds, of hours playing it.
You might be surprised to learn that WoG is still actively developed. It continues to receive updates and new modifications under the name ERA Project. Installing the last stable version, WoG 3.58f, was never particularly user-friendly.
A few years ago, Heroes Launcher was created, making it possible to install Wake of Gods with just a few clicks. Its biggest advantage is automatic updates and a built-in Mod Browser, allowing you to install new modifications with a single click.
I. Installing Heroes III Complete (GOG)
To install all future modifications, you’ll need Heroes III Complete, available on GOG.com. Purchase the game (it usually costs around €4 during sales) and install it first.
- Log in to your GOG account and download the “Offline Backup Game Installers”.
- You’ll receive two files: one with the .exe extension and one with the .bin extension. Save both files to your PC.
- Run the .exe installer. Choose your preferred installation language, then select where you want the game to be installed (click Options in the lower-left corner).
- Do NOT install the game into the Program Files folder!
- For this guide, I’ll use the following installation path:
C:\Portable\Heroes 3 Complete - Once the installation is complete, click Exit.

II. Installing Heroes Launcher
To make installing Heroes 3.5: In the Wake of Gods (ERA Project) as easy as possible, we’ll use Heroes Launcher, which offers all the benefits mentioned above.
- Download Heroes Launcher from the official GitHub repository. The file is called Heroes-Launcher.exe.
- Run the installer and choose “Install for anyone using this computer”.
- Select where Heroes Launcher should be installed.
- Use the same location as your Heroes III Complete installation:
C:\Portable\Heroes Launcher - Launch Heroes Launcher.

Don’t worry, the installation window will be in the language of your WIndows.
III. Installing Wake of Gods (ERA Project)
Once Heroes Launcher is running, switch to the ERA tab and click “Install” in the lower-left corner.
- Select the folder where Heroes III Complete is installed. In this guide, that’s:
C:\Portable\Heroes 3 Complete - Click “Install ERA Project to a new folder and copy the original game files”.
- Click “Start Installation”.
- When the installation is complete, the “Install” button will change to “Play”.


IV. Heroes III HD Mod Settings
Don’t click Play just yet, we still have a few important steps to complete. It’s a good idea to configure the HD Mod according to your monitor’s resolution.
- Click the gear icon next to the “Play” button.
- Select “HD Mod Settings”.
- Feel free to experiment with different resolutions and filters. These are the settings I personally use with a 1920×1080 monitor (see screenshot).
- If you have selected your settings, click “Exit”.

V. ERA Project Mod Browser
Next, we’ll install a few modifications. Click Mod Browser. You’ll find a huge collection of mods that can be installed with a single click.
Below is the list of modifications that I personally use. I prefer to keep the gameplay close to the original Heroes III experience while adding a few fresh features.
These are my recommended mods for beginners. Once you’re familiar with them, I also recommend trying Advanced Classes, Raid Boss, and Third Upgrades.


These are my recommended mods for beginners.
VI. Activating Mods with Mod Manager
After installing the mods, you still need to activate them. Click the “Mod Manager” button. In Mod Manager you’ll see which modifications are currently enabled and which are disabled.
To enable a mod:
- Select the desired modification.
- Click Enable in the upper-left corner.
To disable a mod:
- Select the modification.
- Click Disable in the upper-left corner.
- Then right-click the disabled mod and choose “Archive” from the context menu. This moves it to the bottom of the list, keeping your active mods organized.

Enable and disable the mods as needed. For your first playthrough, feel free to use my recommended setup (shown in the screenshot). As you become more familiar with ERA Project, you can gradually experiment with additional modifications. Once you’re finished, close Mod Manager by clicking the “X” button in the upper-left corner.
You’re now ready to launch the game by clicking “Play”.

VII. WoG Options
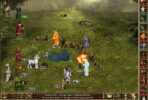
Before starting your first game, don’t forget to check the WoG Options menu where you can customize the game even more. After that, you’re ready to generate a map and begin your adventure!If you’ve followed every step in this guide, your game should look like this:
Heroes III Griffin shield badge in stock

WoG Folder – All HoMM mods in one place


OpenGL by Verox is not available to me? It there a trick or not up to date?
I also noticed it’s missing; it’s possible it’s already outdated. I’ll try to find out what happened.
Hi i have a problem 🙁 I stuck on the III. Installing Wake of Gods (ERA Project) – At the bottom of the installer window, right next to the “Start installation” button, I get a red error message: “No connection to server”, which keeps the installation button greyed out and inactive. Please help 🙁
Hi, you need to update Heroes Launcher to version 1.3. Open Heroes Launcher and click the menu in the top-left corner; the update should appear automatically.
In the Mod Third Upgrades,after several months,the computers usually lost their armies by getting in some creature banks,just like Olympus Forbidden。why?I think the computers
will become stronger but not weaker。
Hey thank you for the guide it worked perfectly for me but i gave a q: when i’m in a battle the enemy replay the attack back before they die is that something can be changed is it a mode how it can be fixed to the original way
Thank you again for everything
Is there a way to translate the in-game language into Vietnamese? Thanks
Hi, after the last update on a launcher, the cursor just disappears, once you move over the start menu… How to fix it? Is it just my bug or someone else saw it?
I tried, but I didn’t notice anything like that, did it happen in ERA Project, or HotA, VCMI?
ERA
It’s OK now. Very weird…
I saw they fixed it, but now I can’t create a new random map – the game keep crashing constantly…
Whats your opinion on MOD: Third Upgrade Mod vs TUM Enchanted? Which one I should select?
Hi, both are good modifications. I like the Third Upgrades mod because it adds new artifacts and creature banks to fight in. I don’t mind the huge number of new units, many of which look terrible and don’t fit the Heroes 3 style.
In terms of the number of new units, I like TUM Enchanted more, it is more sensitive to new units. But I have to say, I don’t use these modifications for longer games.